Written by Kurt Hendrickson, Quality Team at Apex Spring & Stamping
Improved Automated Metrology With A CMM
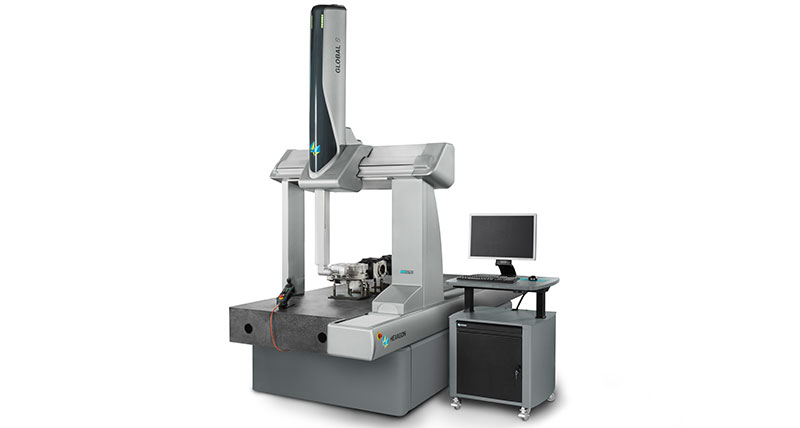
In 2008 Apex Spring and Stamping made the decision to invest in automated metrology by purchasing two CMM’s. Most specifically know as Coordinate Measuring Machines. Initially, the goal was to increase the efficiency of measuring our products. Furthermore, speeding up our process manufacturing, improving reliability, shortening delivery times, and offering competitive pricing. The CMM decreases the time required to measure products and increases the repeatability of the measurements. This makes for a more consistent product.
How The CMM Works
The CMM works by touching the part and recording the x,y, & z value (coordinate) of its location. This is referred to as a hit. Geometric features can be mathematically produced and measurements taken from the hit data. The CMM is able to run at speeds of up to 500 mm/s with an accuracy of less than 4 micros. Thus, removing human error from the process, and improving quality.

First Article Layout
Previously, a first article inspection could take several hours to perform. This was reduced to mere minutes. A machine operator no longer had to interpret the drawing. Also a Quality Technician was no longer needed to verify the machine operator. The CMM is programmed to measure the product according to the drawing specifications and report the findings in an easy to read the document. Resulting in the product being measured the same way every time.
This means that product launch, initial setup, in-process inspections, and final inspection are all inspected in the exact same way. This adds the value of consistency to the product. In Addition all production and quality personnel are trained on how to run the CMM. Every time the CMM is run a report is generated and saved on file in our computer system. This makes the retrieval of data possible.
Being computer-driven, the CMM is also able to use additional software to instantly transfer its results to our Statistical Processing Control (SPC) software. We use this to monitor our production process. This also reduces wasted time spent entering data and removes data errors caused by typos.
Additional Improvements to the CMM
As Apex continued to see the value in this automated process, in 2014 Apex added an additional CMM and upgraded to an analog probe. This scans the product, returning multiple touchpoints instead of a touch trigger probe which only takes readings where specifically programmed to do so. Apex was able to further reduce run times by 25% while collecting more data points for making measurements. More data in makes for more accurate results out, overall making for improved quality products.
Keyence Instant Measurement System
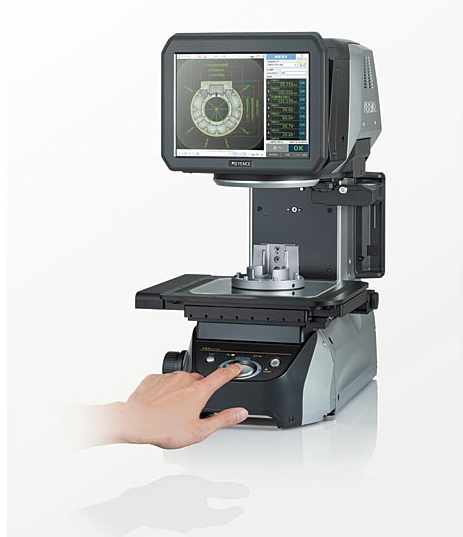
Along with the addition of CMM’s to Apex’s automated metrology equipment, Apex added a Keyence Instant measurement system. This is another measuring machine that helps reduce costs, speed production, and ensure the quality. The system uses optics to detect the product and measures its features. It can do up to 100 measurements, in accordance to how it is programmed. The instant part of its name is just that. It does this in mere seconds and is as accurate as the CMM. You may be asking yourself why not use the Keyence to measure everything if it can do in seconds what takes the CMM minutes? Well, the answer is that the Keyence system is only capable of measuring in two dimensions whereas the CMM is able to use all three.

Throughout the years, Apex has added four additional Instant measurements systems. These are strategically placed throughout our Grand Rapids facility so our team members can quickly check the part they are working on to make sure it is in compliance.
How Can We Help?
For over 10 years, Apex has been able to bring West Michigan an automated metrology experience. The benefits are supporting local manufacturing and with user-friendly and precise metrology equipment, we are not just making GREAT springs, but APEX springs! Contact Us or Request A Quote today!
| Contact Us | Request A Quote |


